Mastering Your Dual Monitor Install: Boost Your Productivity in a Seamless Workspace
Understanding Dual Monitor Install Basics
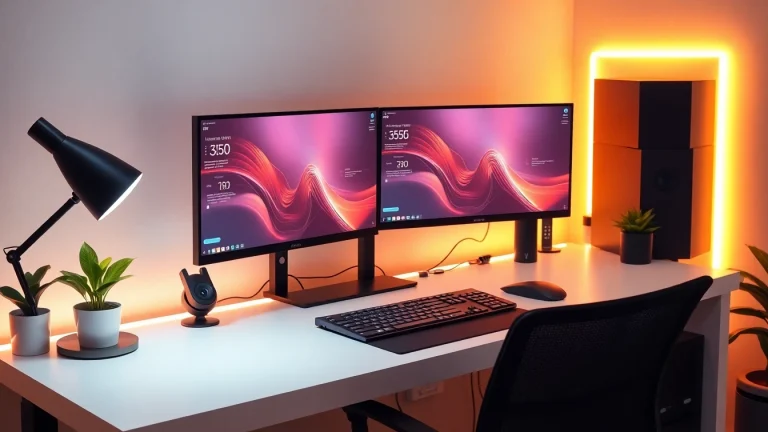
What is a Dual Monitor Setup?
A dual monitor setup involves the use of two computer monitors connected to a single computer, enhancing your workspace and productivity by providing additional screen real estate. Instead of being confined to one display, users can spread their applications and tasks across multiple screens, which is particularly beneficial for professionals who work with large datasets, designers, developers, and anyone who routinely multitasks.
Benefits of Using Dual Monitors
Implementing a dual monitor setup can significantly enhance your workflow. Here are some compelling benefits:
- Increased Productivity: Studies reveal that dual monitors can boost productivity by up to 30% as users find it easier to manage and organize their tasks.
- Enhanced Multitasking: Users can easily switch between applications, reference documents, analyze data, and communicate, all at the same time.
- Improved Collaboration: Sharing content across multiple screens can facilitate smoother collaboration, especially in team environments.
- Better Ergonomics: A well-arranged dual monitor configuration can reduce eye strain and improve posture, promoting a healthier workspace.
Assessing Your Computer’s Compatibility
Before you embark on your dual monitor install, it is crucial to assess whether your computer supports multiple displays. Key elements to check include:
- Graphics Card: Most modern graphics cards support dual displays. Refer to your graphic card specifications to see if it has multiple output ports.
- Available Ports: Common connections include HDMI, DisplayPort, DVI, or VGA. Ensure your computer has the appropriate ports available for your monitors.
- Operating System: Check that your operating system supports multiple monitors—Windows, macOS, and Linux all provide functionality for dual monitor setups.
Preparing for a Successful Dual Monitor Install
Gathering Necessary Equipment
Setting up dual monitors requires specific equipment. Here’s a checklist to ensure you have everything you need:
- Monitors: Choose monitors that suit your needs regarding size, resolution, and display technology (LCD, LED, or OLED).
- Cables: Depending on your monitors and computer, you may need HDMI, DisplayPort, DVI, or VGA cables.
- Adapters: If your monitors and computer ports do not match, you might require adapters (e.g., HDMI to DisplayPort).
- Monitor Stand or Mounts: Consider using a dual monitor stand or wall mount for optimal positioning and ergonomics.
Choosing the Right Cables and Adapters
Using the right cables is essential for your dual monitor setup. Here’s what you need to consider:
- Quality: Invest in high-quality cables to ensure optimal signal transmission and avoid degradation in display quality.
- Type: Match the cable type to your monitor’s input. For example, if your monitor has a DisplayPort input and your graphics card has HDMI output, you’ll need an HDMI to DisplayPort adapter.
- Length: Ensure you choose cables long enough to comfortably connect your monitors without stretching or bending the cables excessively.
Workspace Setup and Arrangement
The arrangement of your monitors and workspace can significantly affect your productivity and comfort. Consider these tips:
- Positioning: Position the monitors at eye level to reduce neck strain. Place them side by side in a slight V-shape for ergonomic viewing.
- Distance: Maintain an arm’s length distance between your eyes and the monitor screens to minimize eye fatigue.
- Lighting: Optimize lighting to prevent glare on the screen. Position monitors away from direct light sources if possible.
Step-by-Step Guide to Dual Monitor Installation
Connecting Your Monitors
With your equipment ready, follow these steps to connect your monitors:
- Power Off: Begin by turning off your computer and monitors.
- Connect Monitors: Plug in the necessary cables into the corresponding ports on the monitors and your computer.
- Power On: Once your cables are connected, turn on your monitors first, followed by your computer.
Adjusting Display Settings
After connecting your monitors, you’ll need to adjust the display settings. This process varies depending on your operating system:
For Windows:
- Right-click on the desktop and select “Display settings.”
- Scroll to “Multiple displays” and select how you want your desktop to appear (either “Extend” or “Duplicate”).
- Adjust the resolution and orientation as necessary.
For macOS:
- Go to Apple menu > System Preferences > Displays.
- Select the “Arrangement” tab to configure the displays and drag them to match your physical setup.
Troubleshooting Common Issues
Even after a successful connection, you may encounter common issues. Here’s how to troubleshoot:
- No Signal: Ensure the monitors are powered on and connected correctly. Swap cables if necessary.
- Incorrect Resolution: Access display settings to ensure your monitors are set to their native resolutions.
- Screen Flickering: Check the cable connections and consider trying different cables to rule out defects.
Advanced Configuration for Dual Monitors
Customizing Display Preferences for Productivity
To maximize efficiency, customizing display preferences can lead to a more productive workflow:
- Taskbar Configuration: On Windows, you can choose to display the taskbar on both screens or just your primary one.
- Application Organization: Strategically place applications on each monitor based on your workflow. For example, keep communication tools on one screen and your work documents on another.
Using Software for Enhanced Multitasking
Consider utilizing third-party software to further enhance your multitasking capabilities:
- Window Management Tools: Applications such as DisplayFusion or UltraMon can provide advanced window management features, allowing you to easily snap windows to specific areas on your screens.
- Virtual Desktops: Both Windows and macOS offer virtual desktop features that can be beneficial when using dual monitors. Utilize this feature to organize different projects or focus areas distinctly.
Creating Custom Shortcuts for Seamless Navigation
Building custom shortcuts can significantly enhance the efficiency of your dual monitor setup:
- Keyboard Shortcuts: Familiarize yourself with keyboard shortcuts for moving windows between screens. For instance, Windows users can press Win + Shift + Left/Right Arrow to move applications smoothly.
- Custom Scripts: Advanced users can create scripts that automatically arrange and open applications on their desired monitors upon login.
Maintaining Your Dual Monitor Setup
Regular Updates and Driver Management
Keeping your system and drivers updated is crucial for optimal performance:
- Graphics Driver Updates: Regularly check for updates to your graphics drivers from your manufacturer’s website to ensure compatibility and performance.
- Operating System Updates: Always install the latest updates for your operating system to benefit from new features and security patches.
Best Practices for Ergonomic Setup
To maintain a comfortable and safe workspace, adhere to these ergonomic guidelines:
- Monitor Height: Keep the top of the monitors at or just below eye level.
- Seating Position: Ensure your chair supports your back and keep your feet flat on the floor.
- Breaks: Remember to take regular breaks from the screen to reduce eye strain and fatigue.
When to Upgrade Your Dual Monitor Equipment
Keep an eye out for signs it may be time to upgrade your dual monitor setup:
- Compatibility Issues: If your equipment no longer supports the latest operating systems or applications, consider upgrading.
- Performance Limitations: If you’re experiencing lag or poor display quality, this could indicate the need for new monitors or a better graphics card.
- Changing Needs: As your work evolves, so too may your requirements for screen size, resolution, or additional features like touch capabilities.